Creating a Movie Database Application
In this tutorial we will create a fully functional movie database application
with Camelot. We assume Camelot is properly installed.
An all in one installer for Windows is available as an SDK to develop Camelot
applications (Python SDK).
Setup Spyder
In this section, we will explain how to setup the Spyder IDE for developing
a Camelot project. If you are not using Spyder, you can skip this and
jump to the next section.
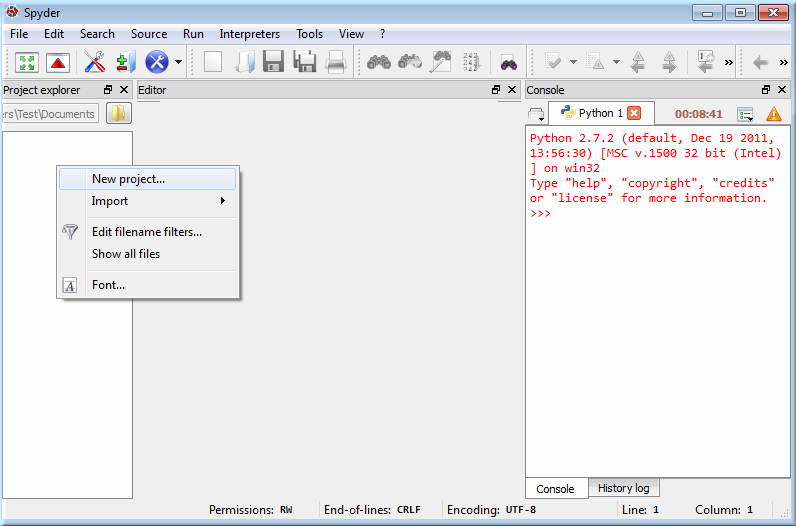
Within Spyder, open the Project Explorer :
In the Project Explorer change the workspace directory, to the directory where
you want to put your Camelot Projects.

Next, still in the Project Explorer, right click to create a new project using :
Enter Videostore as the project name.
Starting a new Camelot project
We begin with the creation of a new Camelot project, using the camelot_admin tool :
Note
From the command prompt (or shell), go to the directory in which the new project should be created.
Type the following command:
python -m camelot.bin.camelot_admin
A dialog appears where the basic information of the application can be filled in.
Select the newly created Videostore directory as the location of the source code.

Press OK to generate the source code of the project.
The source code should now appear in the selected directory.
Main Window and Views
To run the application, double click on the main.py file in Spyder, which contains the entry point of your Camelot application and run this file.
Note
From the command prompt, simply start the script
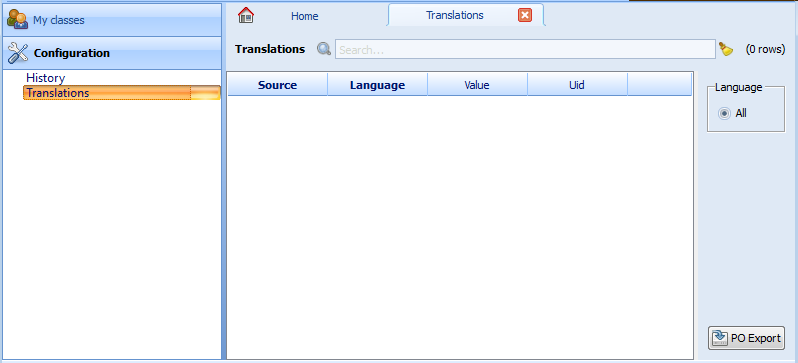
your Qt GUI should look like the one we show in the picture below:

The application has a customizable menu and toolbar, a left navigation pane, and a central
area, where default the Home tab is opened, on which nothing is currently displayed.
The navigation pane has its first section expanded.

The navigation pane uses Sections to group Actions.
Each button in the navigation pane represents a Section, and each entry of the navigation tree is an Action.
Most standard Actions open a single table view of an Entity in a new tab.
Notice that the application disables most of the menus and the toolbar
buttons. When we open a table view, more options become available.
Entities are opened in the active tab, unless
they are opened by selecting Open in New Tab from the context menu (right click)
of the entity link, which will obviously open a new tab to right.
Tabs can be closed by clicking the X in the tab itself.
Each row is a record with some fields that we can edit (others might not be
editable). Let’s now add a new row by clicking on the new icon (icon farthest the
the left in the toolbar above the navigation pane).

We now see a new window, containing a form view with additional fields.
Forms label required fields in bold.

Fill in a first and last name, and close the form. Camelot will automatically
validate and echo the changes to the database. We can reopen the form by
clicking on the blue folder icon in the first column of each row of the table. Notice
also that there is now an entry in our table.

That’s it for basic usages of the interface. Next we will write code for our
database model.
Creating the Movie Model
Let’s first take a look at the main.py in our project directory.
It contains a my_settings object which is appended to the global settings.
The Global settings object contains the global configuration for things such as database and file location.
class MySettings( SimpleSettings ):

    # add an ENGINE or a CAMELOT_MEDIA_ROOT method here to connect
    # to another database or change the location where files are stored
    #
    # def ENGINE( self ):
    #     from sqlalchemy import create_engine
    #     return create_engine( 'postgresql://user:passwd@127.0.0.1/database' )

    def setup_model( self ):
        """This function will be called at application startup, it is used to
        setup the model"""
        from camelot.core.sql import metadata
        from camelot.core.orm import setup_all
        metadata.bind = self.ENGINE()
        import camelot.model.authentication
        import camelot.model.i18n
        import camelot.model.memento
        import myapplication.model
        setup_all()
        metadata.create_all()

my_settings = MySettings( 'My Company', 'My Application' )
settings.append( my_settings )
Now we can look at model.py. Camelot has already imported some classes
for us. They are used to create our entities. Let’s say we want a movie entity
with a title, a short description, a release date, and a
genre.
The aforementioned specifications translate into the following Python code,
that we add to our model.py module:
from sqlalchemy import Unicode, Date
from sqlalchemy.schema import Column
from camelot.core.orm import Entity
from camelot.admin.entity_admin import EntityAdmin

class Movie( Entity ):

    __tablename__ = 'movie'

    title = Column( Unicode(60), nullable = False )
    short_description = Column( Unicode(512) )
    release_date = Column( Date() )
    genre = Column( Unicode(15) )
Note
The complete source code of this tutorial can be found in the
camelot_example folder of the Camelot source code.
Movie inherits camelot.core.orm.Entity, which is the declarative base class for all objects that should be stored in the database.
We use the __tablename__ attribute to to name the table ourselves in which the data will be stored, otherwise a default tablename would have been used.
Our entity holds four fields that are stored in columns in the table.
title = Column( Unicode(60), nullable = False )
title holds up to 60 unicode characters, and cannot be left empty:
short_description = Column( Unicode(512) )
short_description can hold up to 512 characters:
release_date = Column( Date() )
genre = Column( Unicode(15) )
release_date holds a date, and genre up to 15 unicode characters:
For more information about defining models, refer to the SQLAlchemy Declarative extension.
The different SQLAlchemy column types used are described here.
Finally, custom Camelot fields are documented in the section camelot-column-types.
Let’s now create an EntityAdmin subclass
The EntityAdmin Subclass
We have to tell Camelot about our entities, so they show up in the
GUI.
This is one of the purposes of camelot.admin.entity_admin.EntityAdmin
subclasses. After adding the EntityAdmin subclass, our Movie class now
looks like this:
class Movie( Entity ):

    __tablename__ = 'movie'

    title = Column( Unicode(60), nullable = False )
    short_description = Column( Unicode(512) )
    release_date = Column( Date() )
    genre = Column( Unicode(15) )

    def __unicode__( self ):
        return self.title or 'Untitled movie'

    class Admin( EntityAdmin ):
        verbose_name = 'Movie'
        list_display = ['title', 'short_description', 'release_date', 'genre']
We made Admin an inner class to strengthen the link between it and the
Entity subclass. Camelot does not force us. Assign your EntityAdmin
class to the Admin Entity member to put it somewhere else.
verbose_name will be the label used in navigation trees.
The last attribute is interesting; it holds a list containing the fields we
have defined above. As the name suggests, list_display tells Camelot to
only show the fields specified in the list. list_display fields are also
taken as the default fields to show on a form.
In our case we want to display four fields: title, short_description,
release_date, and genre (that is, all of them.)
The fields displayed on the form can optionally be specified too in the form_display
attribute.
We also add a __unicode__() method that will return either the title of the
movie entity or 'Untitled movie' if title is empty. The __unicode__()
method will be called in case Camelot needs a textual representation of an
object, such as in a window title.
Let’s move onto the last piece of the puzzle.
Configuring the Application
We are now working with application_admin.py.
One of the tasks of application_admin.py is to specify the sections in the left pane of the main window.
The created application has a class, MyApplicationAdmin.
This class is a subclass of camelot.admin.application_admin.ApplicationAdmin, which is used to control the overall look and feel of every Camelot application.
To change sections in the left pane of the main window, simply overwrite the get_sections method, to return a list of the desired sections.
By default this method contains:
def get_sections(self):
    from camelot.model.memento import Memento
    from camelot.model.i18n import Translation
    return [ Section( _('My classes'),
                      self,
                      Icon('tango/22x22/apps/system-users.png'),
                      items = [] ),
             Section( _('Configuration'),
                      self,
                      Icon('tango/22x22/categories/preferences-system.png'),
                      items = [Memento, Translation] )
            ]
which will display two buttons in the navigation pane, labelled 'My classes'
and 'Configurations', with the specified icon next to each label. And yes,
the order matters.
We need to add a new section for our Movie entity, this is done by
extending the list of sections returned by the get_sections method with a
Movie section:
from videostore.model import Movie
return [ Section( _('Movie'),
                  self,
                  Icon('tango/22x22/apps/system-users.png'),
                  items = [Movie] ),
         Section( _('Configuration'),
                  self,
                  Icon('tango/22x22/categories/preferences-system.png'),
                  items = [Memento, Translation] )
        ]
The constructor of a section object takes the name of the section, a reference
to the application admin object, the icon to be used and the items in the
section. The items is a list of the entities for which a table view should
shown.
Camelot comes with the Tango
icon collection; we use a suitable icon for our movie section.
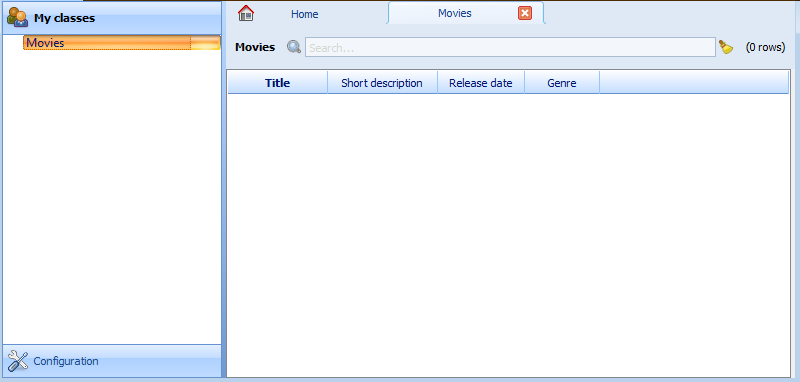
We can now try our application.
We see a new button the navigation pane labelled ‘Movies’. Clicking on it
fills the navigation tree with the only entity in the movies’s section.
Clicking on this tree entry opens the table view. And if we click on the blue
folder of each record, a form view appears as shown below.
That’s it for the basics of defining an entity and setting it for display in
Camelot. Next we look at relationships between entities.
Relationships
We will be using SQLAlchemy’s sqlalchemy.orm.relationship API. We’ll
relate a director to each movie. So first we need a Director entity. We
define it as follows:
class Director( Entity ):

    __tablename__ = 'director'

    name = Column( Unicode( 60 ) )
Even if we define only the name column, Camelot adds an id column
containing the primary key of the Director Entity. It does so because we
did not define a primary key ourselves. This primary key is an integer number,
unique for each row in the director table, and as such unique for each
Director object.
Next, we add a reference to this primary key in the movie table, this is called
the foreign key. This foreign key column, called director_id will be an
integer number as well, with the added constraint that it can only contain
values that are present in the director table its id column.
Because the director_id column is only an integer, we need to add the
director attribute of type relationship. This will allow us to use
the director property as a Director object related to a Movie
object. The relationship attribute will find out about the director_id
column and use it to attach a Director object to a Movie object
from sqlalchemy.schema import ForeignKey
from sqlalchemy.orm import relationship

class Movie( Entity ):

    __tablename__ = 'movie'

    title = Column( Unicode( 60 ),  nullable = False )
    short_description = Column( Unicode( 512 ) )
    release_date = Column( Date() )
    genre = Column( Unicode( 15 ) )

    director_id = Column( Integer, ForeignKey('director.id') )
    director = relationship( 'Director',
                             backref = 'movies' )

    class Admin( EntityAdmin ):
        verbose_name =  'Movie'
        list_display = [ 'title',
                         'short_description',
                         'release_date',
                         'genre',
                         'director' ]

    def __unicode__( self ):
        return self.title or 'untitled movie'
We also inserted 'director' in list_display.
To be able to have the movies accessible from a director, a backref is
defined in the director relationship. This will result in a movies
attribute for each director, containing a list of movie objects.
Our Director entity needs an administration class as well. We will also
add __unicode__() method as suggested above. The entity now looks as
follows:
class Director( Entity ):
    __tablename__ = 'director'

    name = Column( Unicode(60) )

    class Admin( EntityAdmin ):
        verbose_name = 'Director'
        list_display = [ 'name' ]
        form_display = list_display + ['movies']

    def __unicode__(self):
        return self.name or 'unknown director'
Note
Whenever the model changes, the database needs to be updated.
This can be done by hand, or by dropping and recreating the database (or deleting the sqlite file).
By default Camelot stores the data in an local directory specified by the operating system.
Look in the startup logs to see where they are stored on your system, look for a line like
[INFO ] [camelot.core.conf] - store database and media in /home/username/.camelot/videostore
For completeness the two entities are once again listed below:
class Movie( Entity ):

    __tablename__ = 'movie'

    title = Column( Unicode( 60 ), nullable = False )
    short_description = Column( Unicode( 512 ) )
    release_date = Column( Date() )
    genre = Column( Unicode( 15 ) )

    director_id = Column( Integer, ForeignKey('director.id') )
    director = relationship( 'Director',
                             backref = 'movies' )

    class Admin( EntityAdmin ):
        verbose_name =  'Movie'
        list_display = [ 'title',
                         'short_description',
                         'release_date',
                         'genre',
                         'director' ]

    def __unicode__( self ):
        return self.title or 'untitled movie'

class Director( Entity ):
    __tablename__ = 'director'

    name = Column( Unicode(60) )

    class Admin( EntityAdmin ):
        verbose_name = 'Director'
        list_display = [ 'name' ]
        form_display = list_display + ['movies']

    def __unicode__(self):
        return self.name or 'unknown director'
The last step is to fix application_admin.py by adding the following
lines to the Director entity to the Movie section:
Section( 'Movies',
         self,
         Icon( 'tango/22x22/mimetypes/x-office-presentation.png' ),
         items = [ Movie, Director ])
This takes care of the relationship between our two entities.
We have just learned the basics of Camelot, and have a nice movie database
application we can play with. In another tutorial, we will learn more advanced
features of Camelot.